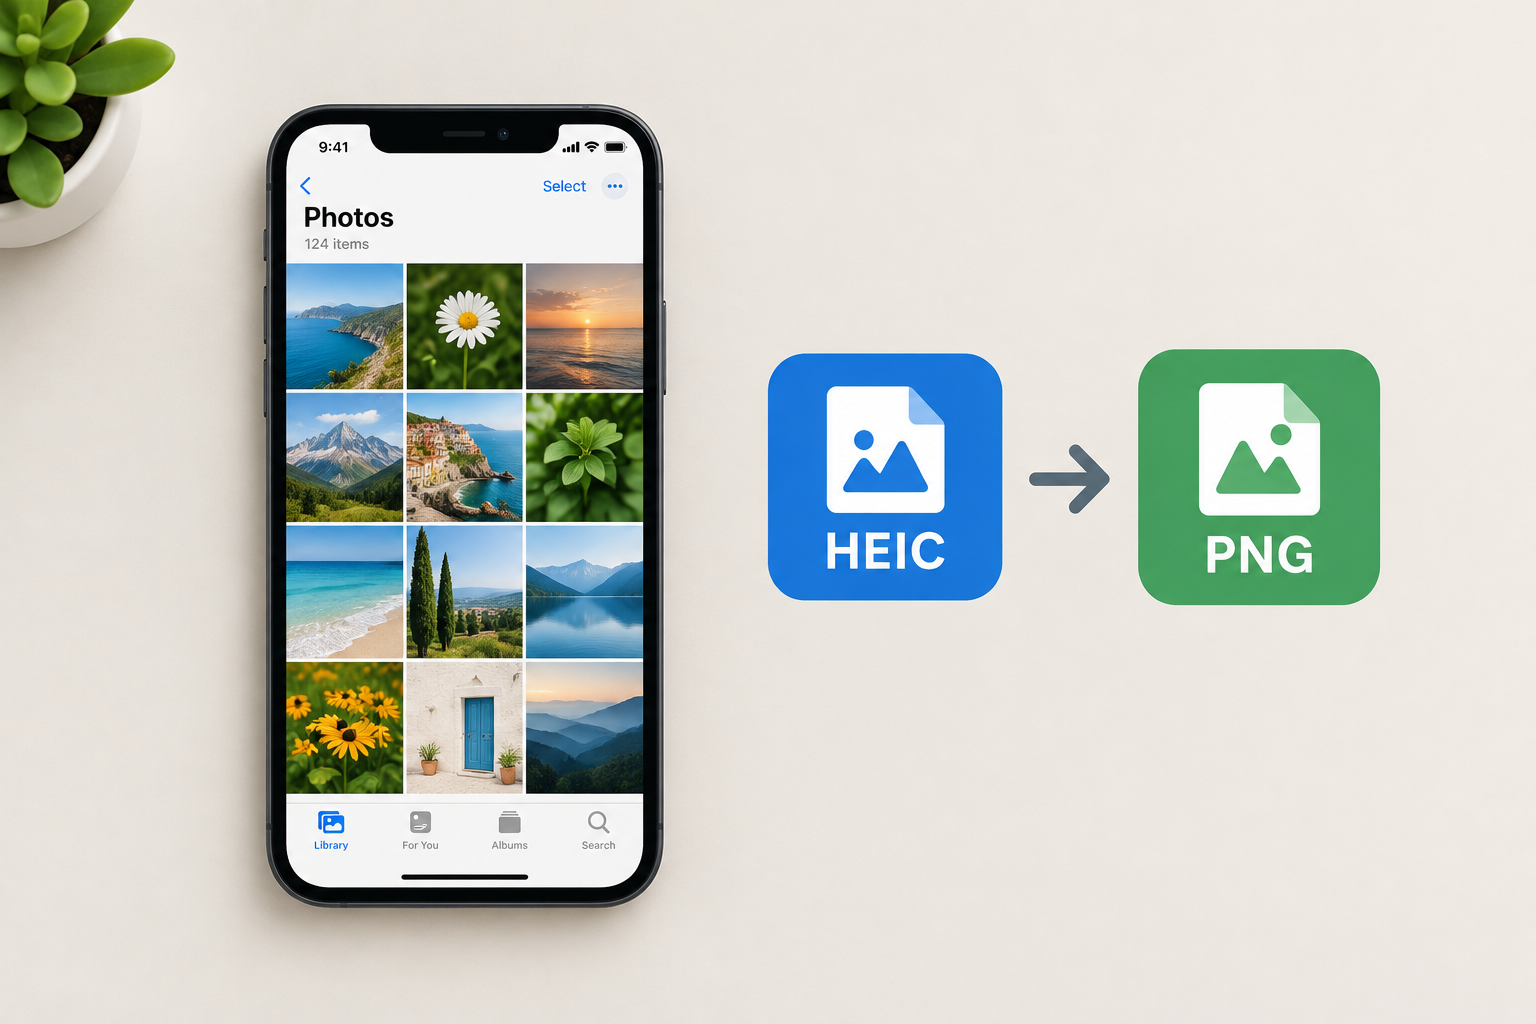
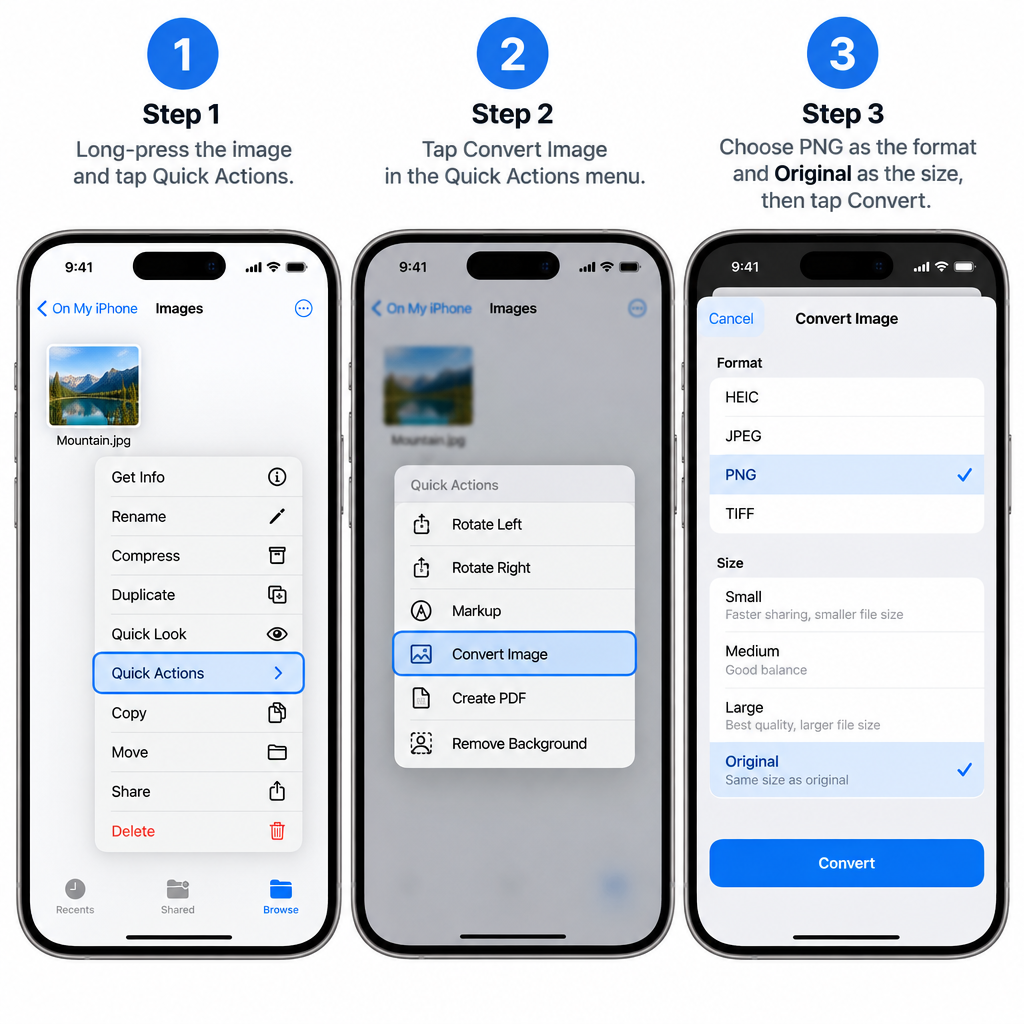
The quickest way to convert a HEIC photo to PNG on an iPhone is the built-in Files app, which has done this since iOS 16. Save the photo to Files, long-press it, then tap Quick Actions > Convert Image > PNG. If you convert photos often, or want the PNGs to land straight back in the Photos app, build a three-action shortcut in the Shortcuts app instead. Neither method needs an extra app or an upload to a website.
HEIC is the iPhone’s default photo format for a good reason. Apple says HEIF (HEIC is the file extension) compresses better than JPEG, so it takes up less space on your iPhone and in iCloud Photos with the same visual quality. Plenty of devices, websites and apps still don’t accept it, though. Sooner or later you’ll need some of your photos in a more widely supported format.
Ways to Convert HEIC to PNG on iPhone
You have two built-in options, and both run entirely on the phone.
Converting HEIC to JPG is the easy case. Copy the photos and paste them into the Files app and they usually come out as JPEG. PNG takes a little more work, because you have to ask for that format on purpose.
Plenty of online converters and App Store apps will do it as well. The trouble is that many of them upload your photos to someone else’s server, and they’re often full of ads or paywalls. That’s a privacy risk for personal photos. Everything below uses only what’s already on your iPhone.
| Method | Best for | Where PNGs end up | Batch conversion |
|---|---|---|---|
| Files app Quick Actions (iOS 16 and later) | A few photos, occasionally | Same Files folder as the original | Yes, using Select |
| Shortcuts app shortcut | Frequent or large batches | An album in Photos | Yes, using Select Multiple |
Quick Method: Convert Image in the Files App
This method needs no setup. It works on any iPhone running iOS 16 or later.
- Open Photos, select the HEIC photos, tap the Share button and choose Save to Files. Pick a folder, such as On My iPhone or iCloud Drive.
- Open the Files app and go to that folder.
- Long-press a photo, then tap Quick Actions > Convert Image.
- Choose PNG, then pick a size. Choose Original to keep full resolution.
- The PNG copy appears in the same folder, next to the original.
To convert several photos at once, tap the More button (three dots) in the top-right corner of the folder, tap Select, pick the images, then follow steps 3 and 4.
Create a HEIC to PNG Shortcut
For regular conversions, a shortcut is faster. It lets you pick photos straight from your library and saves the PNGs back into Photos. The Shortcuts app comes preinstalled on every current iPhone. If you deleted it, you can download it again from the App Store.
Building the shortcut takes only a couple of minutes. You add three actions and change a few settings. After that, it converts one image or a whole batch with a single tap.
Note: Before you start, create a new album in the Photos app, for example one named PNG. You can then pick it as the destination for the converted images while you build the shortcut.
Step 1: Open the Shortcuts app on your iPhone.
Step 2: Go to the Shortcuts tab, then tap the Add button (+) in the top-right corner. A new, empty shortcut opens in the editor. Tap Search Actions at the bottom of the screen.
Step 3: Search for these actions and add them in this order:
- Select Photos
- Convert Image
- Save to Photo Album
Tip: After you add an action, tap Search Actions again to start looking for the next one straight away.
Step 4: Change the settings of the actions you just added:
- Select Photos: expand the action and turn on Select Multiple.
- Convert Image: change the output format from JPEG to PNG.
- Save to Photo Album: tap Recents and choose your destination album. This example uses an album named PNG.
Step 5: Tap the shortcut’s name at the top of the editor, rename it something like HEIC to PNG, then tap Done.
That’s it. The shortcut is ready to use.
Using the HEIC to PNG Shortcut
To start converting, tap the shortcut in the Shortcuts app. You’ll find it in the Shortcuts tab. You can also add a Shortcuts widget to your Home Screen or Today View, or ask Siri to run it by saying its name, for example “Siri, HEIC to PNG.”
A photo picker appears. Go to an album and select the image or images you want to convert. There’s no limit on how many you can pick.
Once you’ve made your selection, tap Add. The shortcut’s tile in the Shortcuts app fills up as each photo is processed, so you can see how far a big batch has got.
When it’s finished, the PNG images are in the album you chose. If you left the destination set to Recents, look in the Recents album or the Library tab.
Keep in mind: The shortcut doesn’t replace the HEIC originals with the PNG copies. If you want to remove the originals, delete them yourself in Photos. They stay in Recently Deleted for 30 days.
To confirm the file format, save one of the converted images to the Files app. Long-press it there, tap Get Info, and check the file type.
If you set up the actions as described, the shortcut should work every time. If something went wrong, you can fix it. Tap the More button (three dots) on the shortcut’s tile, or long-press the tile and choose Edit, then change the action settings.
Things to Know Before You Convert
Once the shortcut is set up, converting HEIC to PNG takes seconds. The next time a website or app won’t accept your iPhone photos, you know what to do.
The downside is file size. PNG is a lossless format, so converted photos are often several times larger than the HEIC originals. If storage is tight, or you only need a widely supported format, convert to JPEG instead. JPEG files are much smaller and almost everything accepts them.
If you’re tired of converting, you can change what the camera saves in the first place. Go to Settings > Camera > Formats and choose Most Compatible. New photos will then be saved as JPEG instead of HEIC. Photos you’ve already taken stay as they are. Apple also notes that AirDrop, Messages and Mail may automatically send a more compatible format, such as JPEG, when the receiving device doesn’t support HEIF.
FAQ
Does converting HEIC to PNG reduce image quality?
No. PNG is lossless, so the converted image keeps all the detail that was decoded from the HEIC file. What changes is the file size, which usually gets much bigger.
Why is my PNG file so much bigger than the HEIC original?
HEIC uses very efficient compression. PNG uses lossless compression, which works well for screenshots and graphics but not for photos. A photo converted to PNG can easily be several times the size of the original. If size matters more than lossless quality, convert to JPEG.
Can I convert HEIC to PNG without installing an app?
Yes. Both methods use only apps that come with iOS: Quick Actions > Convert Image in the Files app (iOS 16 and later) and the Convert Image action in Shortcuts. Nothing is uploaded to a website.
How do I stop my iPhone from taking photos in HEIC?
Go to Settings > Camera > Formats and select Most Compatible. The camera will then save new photos as JPEG. This only works on iPhone and iPad models that can capture HEIF, and it doesn’t change photos already in your library.
Does the shortcut delete my original HEIC photos?
No. The shortcut saves new PNG copies and leaves the originals untouched. If you want the space back, delete the HEIC versions in Photos and empty the Recently Deleted album.
Can I convert HEIC to JPG the same way?
Yes. In the Files app, choose JPEG instead of PNG under Convert Image. In the shortcut, leave the Convert Image action set to its default, JPEG. JPEG files are much smaller than PNG and work almost everywhere.
Sources
- Apple Support: Using HEIF or HEVC media on Apple devices
- Apple Shortcuts User Guide for iPhone: Create a custom shortcut
- Apple Shortcuts User Guide for iPhone: Intro to transform actions