Start by reopening Microsoft Word. After a crash, Word usually opens any recovered documents on its own, and you should save them straight away with File > Save As. If nothing comes back, look in the hidden AutoRecovery folder at ~/Library/Containers/com.microsoft.Word/Data/Library/Preferences/AutoRecovery, then the Trash, then the macOS temporary folder. If all of those are empty, try Time Machine or OneDrive version history before you turn to paid data recovery software.
Microsoft Word is the most widely used word processor in the world, and most Mac owners have it installed. So most people know the sinking feeling when a document they have been working on disappears before it was saved.
Why Word documents go missing on a Mac
The usual causes are closing Word by accident, Word crashing, or an unexpected macOS error or shutdown. Each one leaves a different trail, so it helps to know where to look.
You have three kinds of tools to work with:
- Word’s own recovery features: AutoRecovery, Recover Text and Version History.
- Tools built into macOS: the Trash, the temporary folder and Time Machine.
- Dedicated data recovery software, for files that are truly gone.
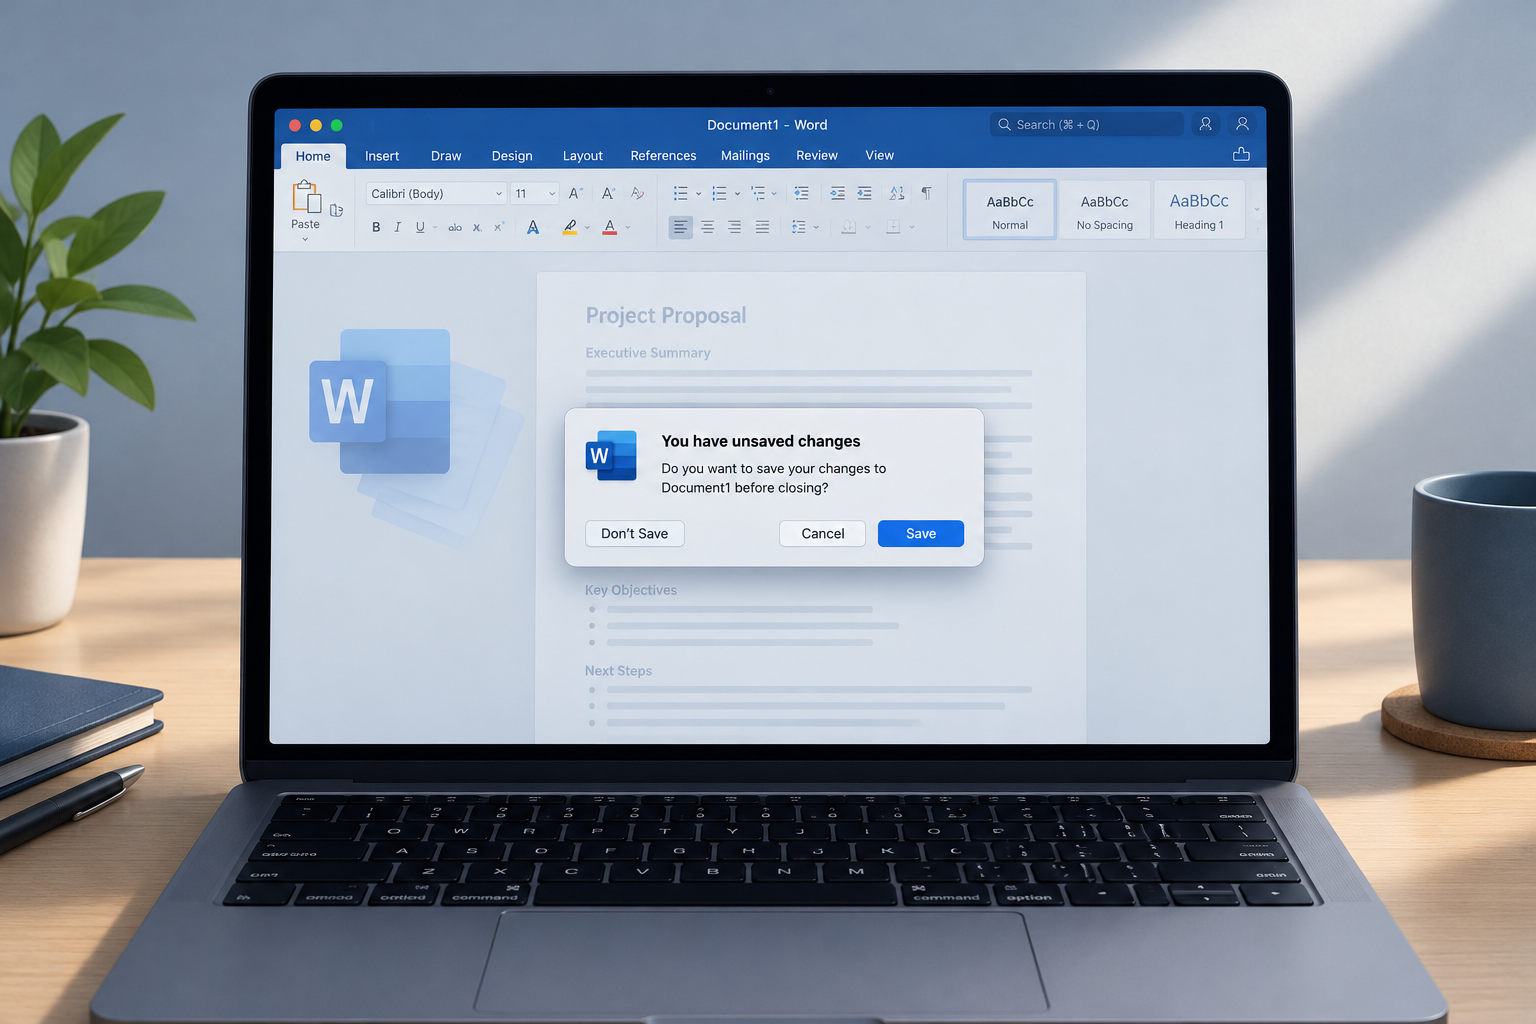
One thing to know before you start: if you closed a document and clicked Don’t Save, Microsoft says Word deletes its AutoRecovery copy. In that case, go straight to the Temporary folder and backup methods below.
One-click solution to recover an unsaved Word document
If you have lost or deleted an important Word document and the free options below find nothing, Disk Drill from CleverFiles can scan your drive for it. You can get it from the developer or as part of the Setapp app subscription.
Disk Drill scans a drive for lost and deleted files and lets you preview what it finds. It also includes tools that help prevent data loss later, such as disk backups, drive health monitoring and alerts when a disk looks like it is failing.
It works with Mac internal drives, external USB drives and SD cards, and it can help whether the file was lost through a mistake, a sudden shutdown or a disk utility error. On a Mac, the free Basic version lets you scan and preview files. Actually recovering ordinary deleted files usually needs the paid Pro edition or a Setapp subscription, which comes with a 7-day free trial.
Here’s how to use Disk Drill to recover a Word document on a Mac:
- Install and open Disk Drill.
- In the left panel, select the drive you want to search, then click Search for lost data.
- When the scan finishes, open the Documents category and review what it found.
- Sort the files by type and date modified, select your Word document and click Recover.
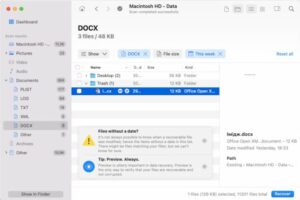
Save the recovered file to a different drive from the one you scanned. Writing to the same drive can overwrite other deleted files you might still need.
How to recover unsaved Word documents with AutoRecovery
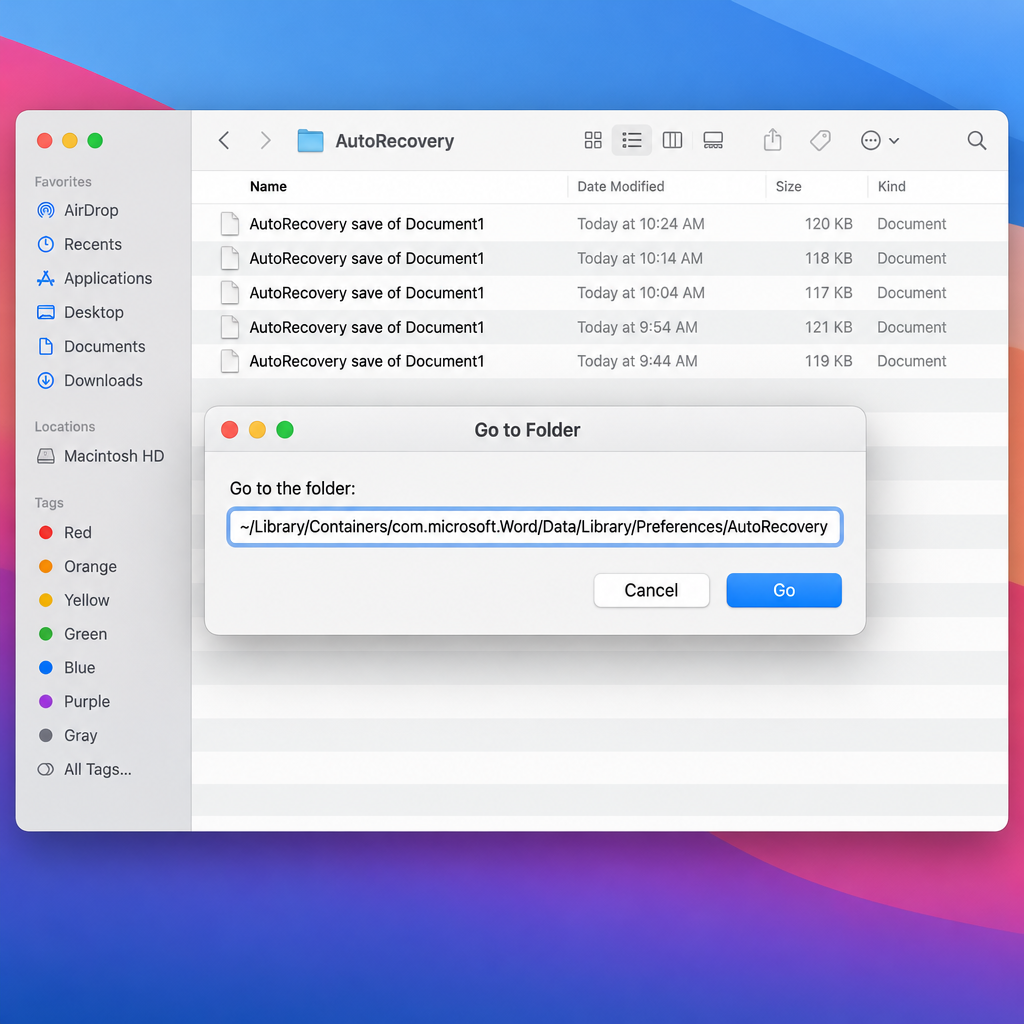
Word’s AutoRecovery feature regularly saves a background copy of every open document to a hidden folder. If Word or macOS crashes, there’s a good chance your work is sitting there. By default, Word saves this copy every 10 minutes.
Reopen Word first. After a crash it normally opens recovered files on its own. If it doesn’t, check the AutoRecovery folder yourself:
- Open Finder.
- In the menu bar, choose Go > Go to Folder.
- Paste ~/Library/Containers/com.microsoft.Word/Data/Library/Preferences/AutoRecovery and press Return.
- Look for files whose names start with “AutoRecovery save of”. Open the right one in Word and use File > Save As to save it somewhere safe right away.
The folder is hidden, so you won’t find it by browsing in Finder. The Go to Folder command is the reliable way in. Microsoft also warns that AutoRecovery is not a replacement for saving. When you save a document yourself, Word deletes the older AutoRecovery copies.
To save AutoRecovery copies more often, go to Word > Settings > Save and lower the number in the Save every box. On older macOS versions, the menu is called Word > Preferences.
How to recover Word documents from the Trash
If you deleted a Word document by mistake and haven’t emptied the Trash, getting it back takes seconds.
- Click the Trash icon in the Dock.
- Look through the files to find your Word document.
- Right-click (or Control-click) the file and choose Put Back.
- The file goes back to the folder it was deleted from.
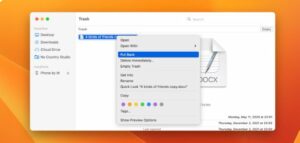
If Put Back is greyed out, you can drag the file from the Trash to your desktop instead. If you deleted the file a moment ago, Edit > Undo Move in Finder can also bring it back.
How to recover lost docs from the Temporary folder
macOS keeps a temporary folder for apps, and Word sometimes leaves a copy of your document there. It’s worth checking, especially if you clicked Don’t Save.
- Open Terminal from Finder > Applications > Utilities.
- Type open $TMPDIR and press Return. A Finder window opens.
- Open the TemporaryItems folder.
- Look for your Word document. Temporary files can have odd names such as “~WRL0001.tmp”, so sort by date modified and open likely files in Word.
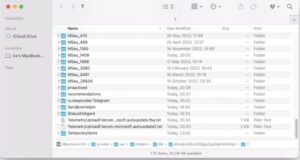
If you find your text, save it to your Documents folder straight away. macOS clears temporary files on its own, often when you restart.
How to recover text from a damaged file in Word
Sometimes the document isn’t missing at all. It just won’t open. That usually means the file is corrupted, but Word’s Recover Text option can often pull the text back out.
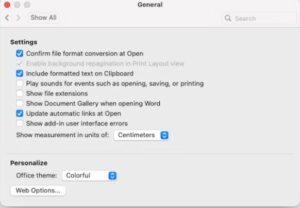
- Open Microsoft Word and choose Word > Settings from the menu bar (Word > Preferences on older versions).
- Under Authoring and Proofing Tools, click General and tick Confirm file format conversion on open.
- Close the General window.
- Choose File > Open from the menu bar.
- Select the damaged file, choose Recover Text from the drop-down menu in the Open window, then click Open.
Expect plain text only. Formatting, images and other non-text content are lost, so you’ll need to tidy the document afterwards.
How to recover documents from a backup
The surest way to stop worrying about lost Word documents is to have a backup. With a good backup you can restore important files quickly, find missing ones and go back to older versions of a document.
The built-in option is Time Machine. If you’ve emptied the Trash, open the folder where the document used to be, click the Time Machine icon in the menu bar and choose Browse Time Machine Backups. Pick a date from before the file disappeared, select the document and click Restore.
You don’t have to back up your whole Mac. You can protect just the folders or files you’re working on, and Get Backup Pro from BeLight Software makes that kind of targeted backup easy to set up.
Get Backup Pro is a Mac backup app that lets you build custom backup plans for any files or folders you choose.
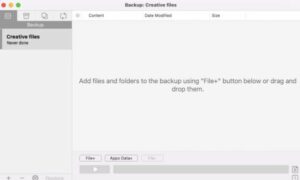
It can also clone your Mac’s disk so you can move your data to a new drive at any time, and it can keep folders in sync both ways with another Mac. The developer says compression can shrink backups to as little as 60% of their original size.
Can you recover a replaced Word document on Mac
Yes, if you saved over a document and want the old one back, as long as the file is stored in OneDrive or SharePoint. Word’s Version History only works for cloud files. For a document stored only on your Mac, restore it from Time Machine or another backup.
- Open the document.
- Click the document name in the title bar and choose Browse Version History. In older versions of Word, choose File > Browse Version History.
- In the list, pick the version you want and click Open Version.
- If it’s the right one, click Restore to make it the current version.
If Browse Version History is greyed out, the file is saved only on your Mac. You can also restore versions from OneDrive in a web browser: right-click the file, choose Version history, and pick the version to restore.
Tips to avoid losing data on Mac
Getting lost work back is a relief, but prevention is much easier. A few habits mean you’ll rarely need any of the steps above.
- Save Word documents early and often. Pressing Command-S every few minutes takes no effort.
- Store important documents in OneDrive and turn on AutoSave (the switch at the top left of the Word window, for Microsoft 365 subscribers). Word then saves as you type and keeps version history.
- Schedule regular backups with Time Machine, and keep one copy on an external drive or off-site.
- Use a reliable power source. On a MacBook, don’t let the battery run flat with unsaved work open.
- Keep macOS and Microsoft Office up to date through System Settings > General > Software Update and Microsoft AutoUpdate.
- Leave the built-in macOS security protections on, and only install apps from the App Store or developers you trust.
Get a reliable Microsoft Word alternative
Some other writing apps are worth a look because of their features, ease of use and clean design. Several of them save every keystroke automatically, so losing an unsaved document stops being possible.
Ulysses is one app that could replace Word for a lot of writing.
Ulysses saves and backs up everything you type automatically, so there’s no such thing as an unsaved file. It’s also very good at organising files. Groups let you keep the research, drafts and notes for one project together, and Filters let you find files that match criteria you set.
Ulysses syncs through iCloud across your Apple devices, so you can work on your writing anywhere. It uses a Markdown-based editor and can export well-formatted ebooks, PDFs and HTML straight from the app.
Craft is another good alternative to Word for writing.
Craft builds documents from blocks, so you can combine text, cards, Markdown and photos into well-organised, good-looking pages. You can sort your work into nested folders, link one document to another and use pages as entry points to sub-pages, which makes it easy to connect your notes.
The trade-off is file format. Schools, publishers and many workplaces still expect a.docx file, and both apps export to Word format, but complex layouts don’t always convert cleanly. If you swap Word documents back and forth with other people a lot, staying with Word and turning on AutoSave is usually the more practical choice.
How to recover a Word document on Mac with ease
Recovering a Word document on a Mac is simple once you know Word’s built-in tools: AutoRecovery, Recover Text for damaged files and Version History. macOS gives you more ways in through the Trash, the temporary folder and Time Machine. If all of those come up empty, Disk Drill can scan the drive for deleted files.
Whichever method works for you, set up a backup now with Time Machine or Get Backup Pro, so your most important files are ready if you ever need to restore them. If you want something other than Word for writing, Ulysses and Craft are both worth trying.
Disk Drill, Get Backup Pro and Ulysses are all available through Setapp, which has a free 7-day trial. That lets you try the recovery and backup tools before you pay for anything. If the drive itself is clicking, isn’t showing up in Finder or holds files you can’t afford to lose, stop using it and contact a professional data recovery service. Every extra scan or write to a failing drive lowers the chance of getting the files back.
FAQ
How do you recover trashed files on Mac?
Open the Trash from the Dock, right-click the Word document and choose Put Back. The file goes back to the folder it came from. If you’ve already emptied the Trash, you’ll need Time Machine or another backup, or data recovery software.
How do I recover deleted files from my Mac without software?
You often don’t need an extra app. Start with Word’s AutoRecovery folder, then check the TemporaryItems folder, then restore from Time Machine or OneDrive version history. All of these are built into Word or macOS and cost nothing.
How do I recover deleted files after emptying the Trash?
Restore them from a Time Machine backup first, because that’s the most reliable route. If you have no backup, data recovery software such as Disk Drill can scan the drive. Stop saving new files to that Mac until you’ve tried, because new data can overwrite what you’re trying to recover.
How do I use Terminal to recover deleted files on Mac?
Open Terminal from Applications > Utilities, type open $TMPDIR and press Return. In the Finder window that opens, look in the TemporaryItems folder for a copy of your Word document. Terminal only opens the folder for you. It can’t bring back files that macOS has already deleted.
Why doesn’t Word show my document after a crash?
Word only recovers files it had time to save to the AutoRecovery folder. By default that happens every 10 minutes, so very new documents may not have a copy yet. If you clicked Don’t Save when closing, Word deletes the AutoRecovery copy. Check the AutoRecovery folder by hand anyway, because the recovery window doesn’t always appear.
What’s the best tool to recover deleted files from a Mac?
For files deleted from a drive with no backup, Disk Drill is one of the best-known Mac recovery tools. It can scan for and preview lost Word documents, photos, videos and archives. Recovering files with it on a Mac generally needs the paid Pro edition or a Setapp subscription, so try the free built-in methods first.
Sources
- Recover files in Office for Mac (Microsoft Support)
- Restore a previous version of a file (Microsoft Support)
- Disk Drill press kit (CleverFiles)
- Setapp pricing explained (Setapp)